
What could be better then a treasure hunting day at The Warehouse Antiques? You know, that big red warehouse goin' up I-75? Reminds me of a country drive with G-ma Betty, windows open, cool afternoon breeze. Seein' all the big bales of hay, and beautiful barns in the distance.


Now this shop, it is right in the middle of downtown and resides on the first floor of a building built in the 1700s. I love the stone and brick walls, so aged and covered in mossy areas.

The second I go through that door, the owner is right there with a huge smile and always gives me a hug and asks how I am. Then she points me in the direction of the good stuff. And it's always at my three favorite booths.


As I walk around I get excited as that wonderful vintage smell rushes up into my nostrils and I just know it's something calling out for me to take it home.

Oh, and look there! A sale at the Oddities booth, my favorite! Maybe I'll find some more Victorian Mourning Jewelry to add to my collection.

I would love to hang this Cashier sign in my house, but of course it's marked "NFS". Makes me so sad when I see that. For those of you that aren't big antique shoppers, NFS means "Not For Sale". Grrrrrr!


Someone please hold the owners eyes closed while I sneak off with their amazing vintage storage spots. The wood filing cabinet would be a dream come true.


The Cubby Faux Fronts Collage Sheet is a dream for those who create miniature scenes. Some areas, I simply cut the image out and glued it to the front of my cubby. You can find the cubbies in a variety of compartments including 2, 3, 4, 6, and 9. Best part, they are easy to assemble.

After cutting out the cubby front, I glued it to a thin piece of cardboard that I had painted a shade of green to match. It's important to remember when you are trimming, to leave a section of excess board to the left of the image. This will be used to attach the image to the cubby.


The important thing about this particular cut, is that it continues down the serrated line. Below, you can see the blue lines, which you cut to allow the "drawers" to insert more easily into the cubby when glued into place.


Now I have a "door" for the cubby that can hold a treasure inside. You can also place a small piece of Velcro on the "door" and cubby edge to hold it closed.

Back to those three favorite booths. I always go in order, the first being the French County Booth.

Look at all of those unique finds.


I love the hanging lantern. I used a simple plant hanger, a touch of gold acrylic paint and strong glue. Make sure to let the glue dry for a few hours so that the hanger is secure.

I have found so many gorgeous items for my kitchen from this booth. Old tins and salt and pepper shakers are a fav. I also have a collection of roosters on top of my fridge, so that baby will be coming home with me.

A giddy yelp came out of me when I found the vintage watercolor paint box full of so many worn paint brushes. I wonder what the former owner painted with them. And even better, it's from France! It's a perfect treasure hunter day when I find something from France.


On to booth number two, the Oddities booth. I have found some really cool finds in here. I have a collection of those crawling babies and religious statues.

One of my favorite collage sheets because the images are all dolls from my real life collection. Remember that TV series Oddities? That show inspired many of my crazy collections including several of the crawling babies.


For a minute, I was excited about those trophies. From a distance they look very detailed, but I was wrong. They were still pretty cool though and I factored in that the booth had a 30% off sale. They're mine, hold them on the counter please!

That Fancy Mini Footstool is covered with the softest leather, the color is stunning, and I MUST have it for my studio!


The Enfant de Prague and Mary statues above are painted cast metal as well as the white horse below. I used several cast metal pieces and painting them was a cinch. I just used my standard acrylic paint and enjoyed the process. I did not stress about making it perfect because antiques are not perfect. They have character.

And this brings me to the third and final booth. I call it, "The Tradition Antique Booth". Why? Because, you can always find fabulous, quality, high end items. But there, on the very bottom row, do you see it? Well it's MINE! I love antique wooden cabinets.


I had a gumball machine just like that when I was seven years old. We got it for Christmas, the whole family, and I was mezmorized. Probably not a good decision on my parent's part because I was a gum hog. I would chew it all up every time they filled it and then one day, it wasn't there anymore. It's a little out of my price range so I had to leave it for another lucky buyer.


Very important note here. Each booth was created using the 4x4 Corner Room Box With Window along with a Wrought Iron Window Grate.


Getting a layered texture onto a flat, vertical surface would scare many artists. But no my praying mantis, you too can acheive this feat. First, add a layer of white acrylic paint, lightly so as not to make the Corner Room Box warp.

Using the Small Stone Wall Stencil, add a thin layer of molding paste and you have now completed the first step.
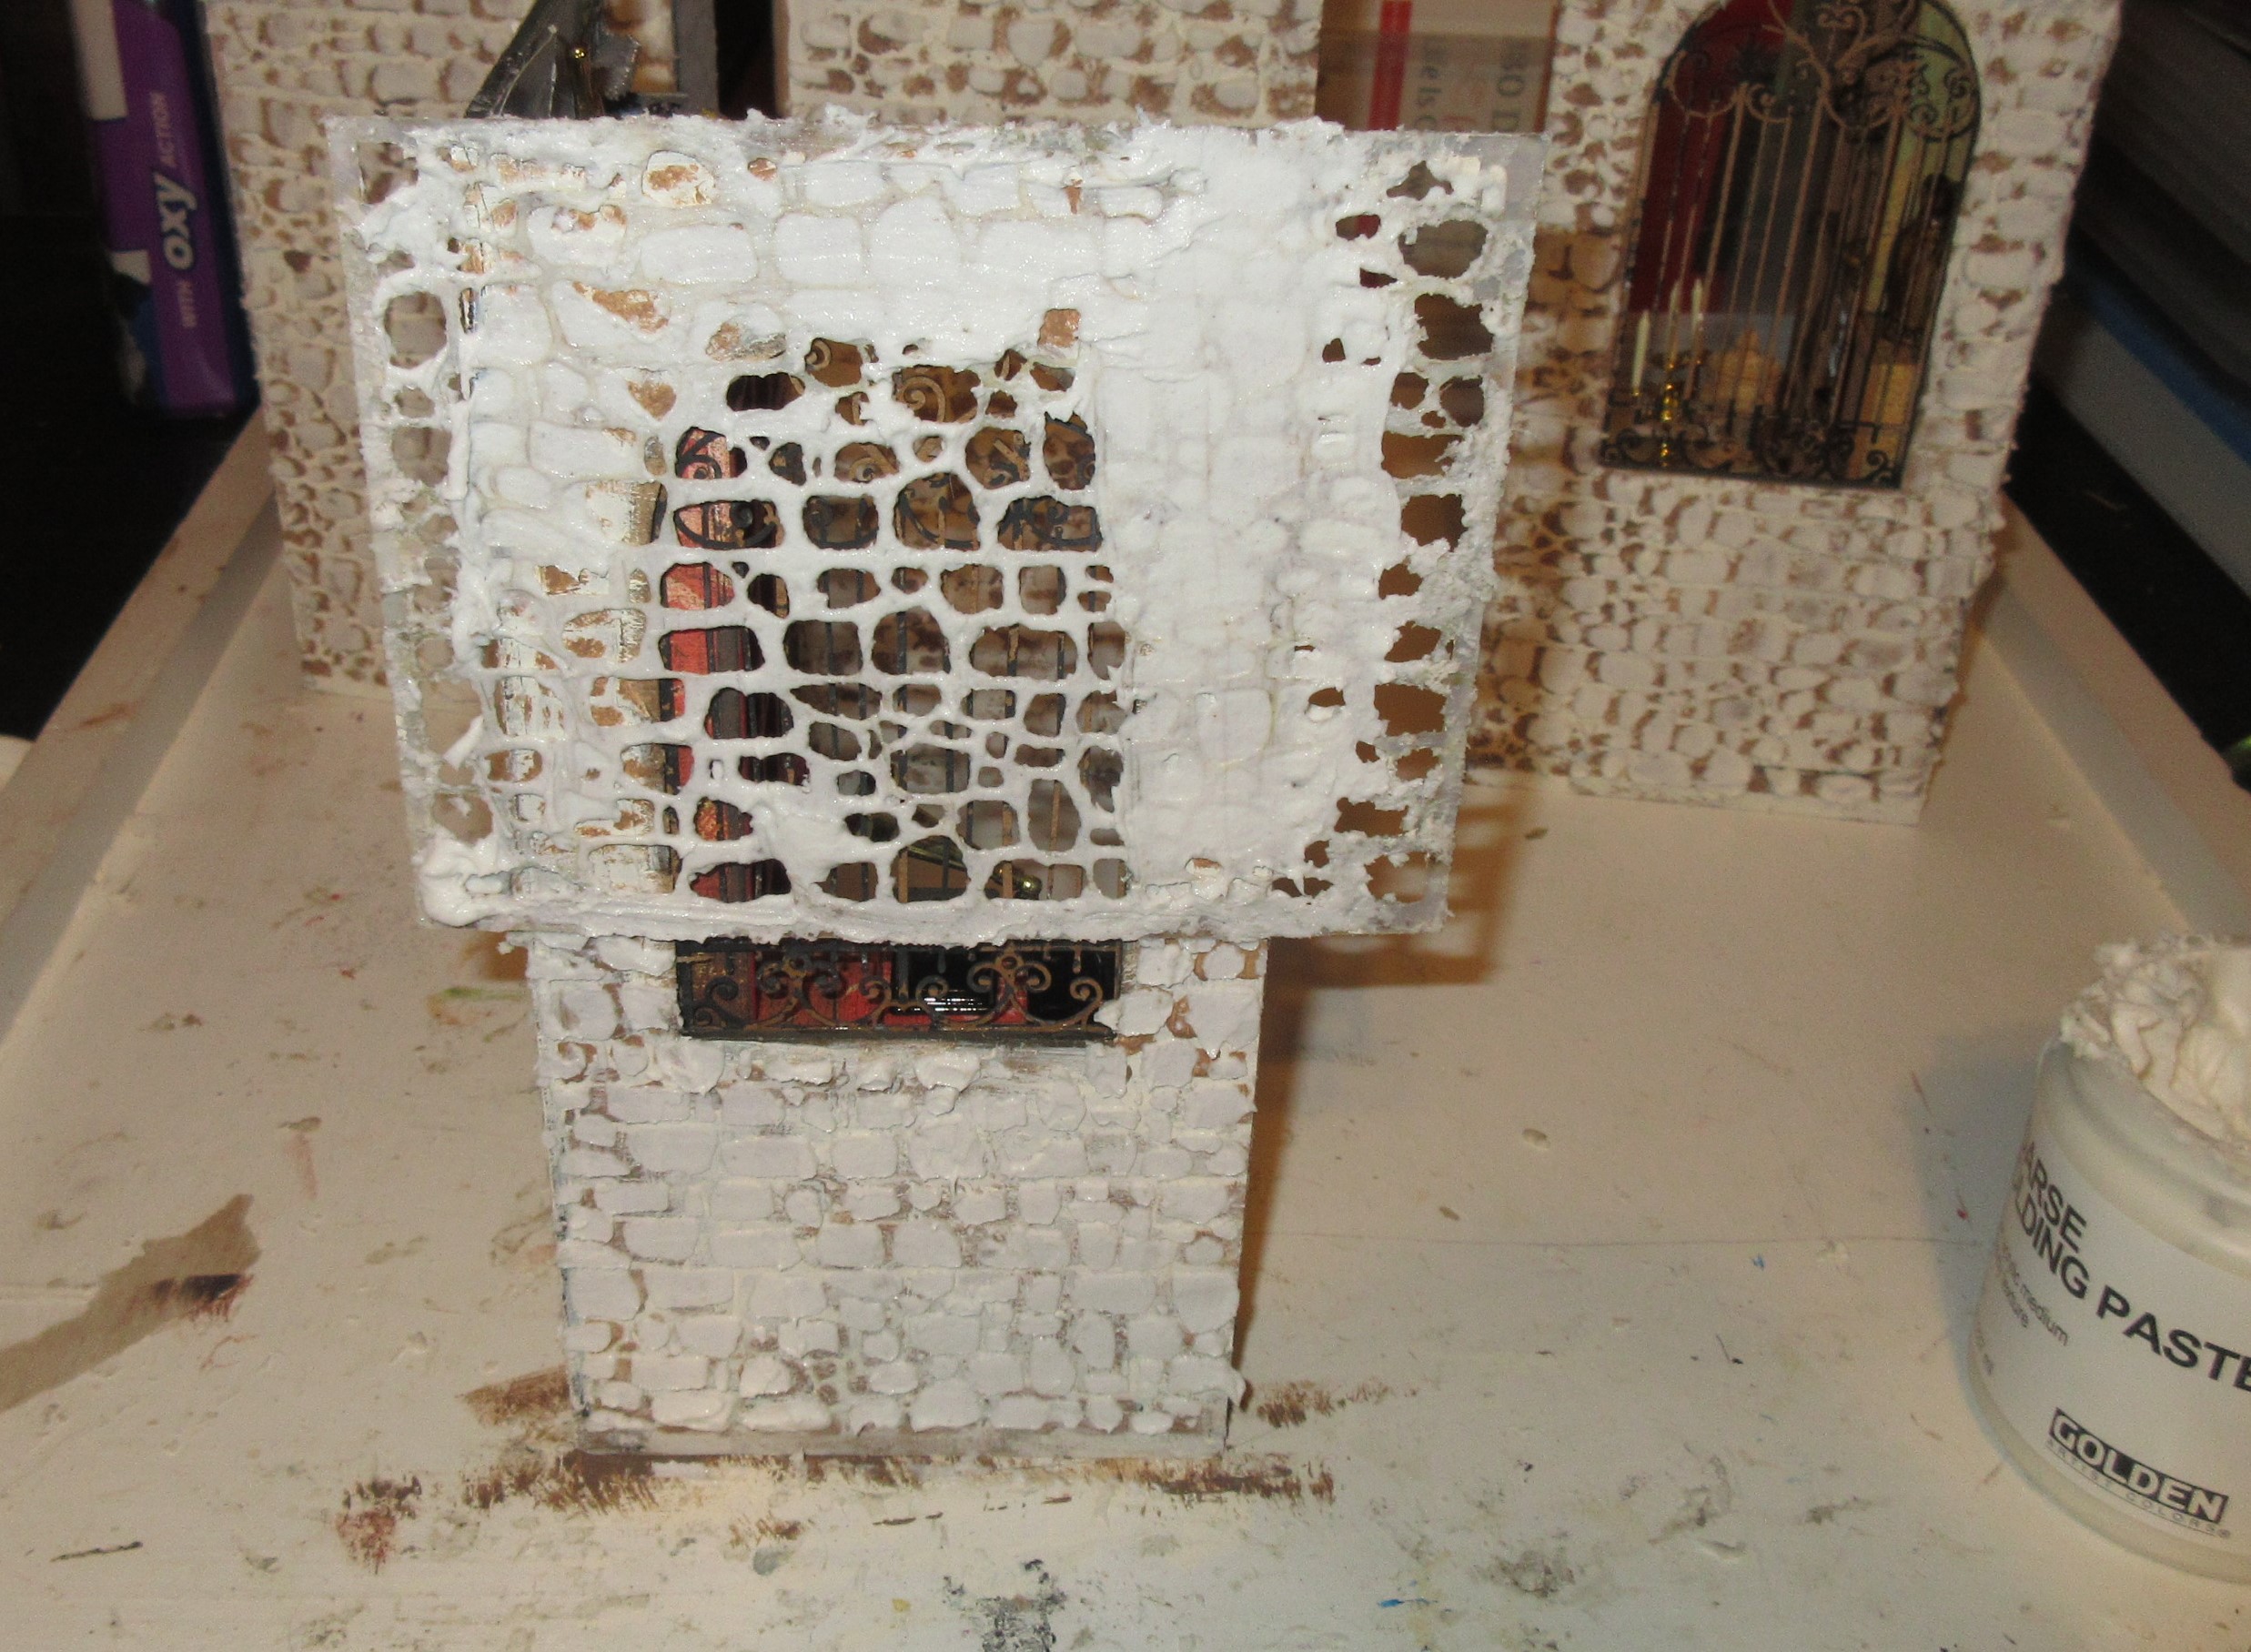
I like to use a heat gun to warm the molding paste. Yes, I realize that is a hair dryer. I could not find my heat gun so I had to improvise with a hair dryer.

I literally heat those little clumps until they bubble up. As they cool, they fall back in and I tap them down with my finger and it is the perfect distressed stone.


Small ink pads come in great for this next step. It is so easy to just run one along the "stone" and it just adds so much depth. I also keep some acrylic colors ready, to paint onto individual stones.


And lastly, some dabs from a green stamp pad and some acrylic paints, and the moss is complete.


I hope you liked your visit to The Warehouse Antiques. Feel free to go onto Google and leave a positive review for the shop. It will be easy because you will have such an amazing search while you're there.

And for the record, the owner's will not "keep the light on for ya". But the GHOSTS will! Don't let em scare you. Just send em into the light like my daughter did!

xoxo
Rhonda...
Remember, as hard as it can be, try to let go of the things that don't bring you happiness, so you can enjoy the remaining chapters that you have.
November 1987 - August 2023